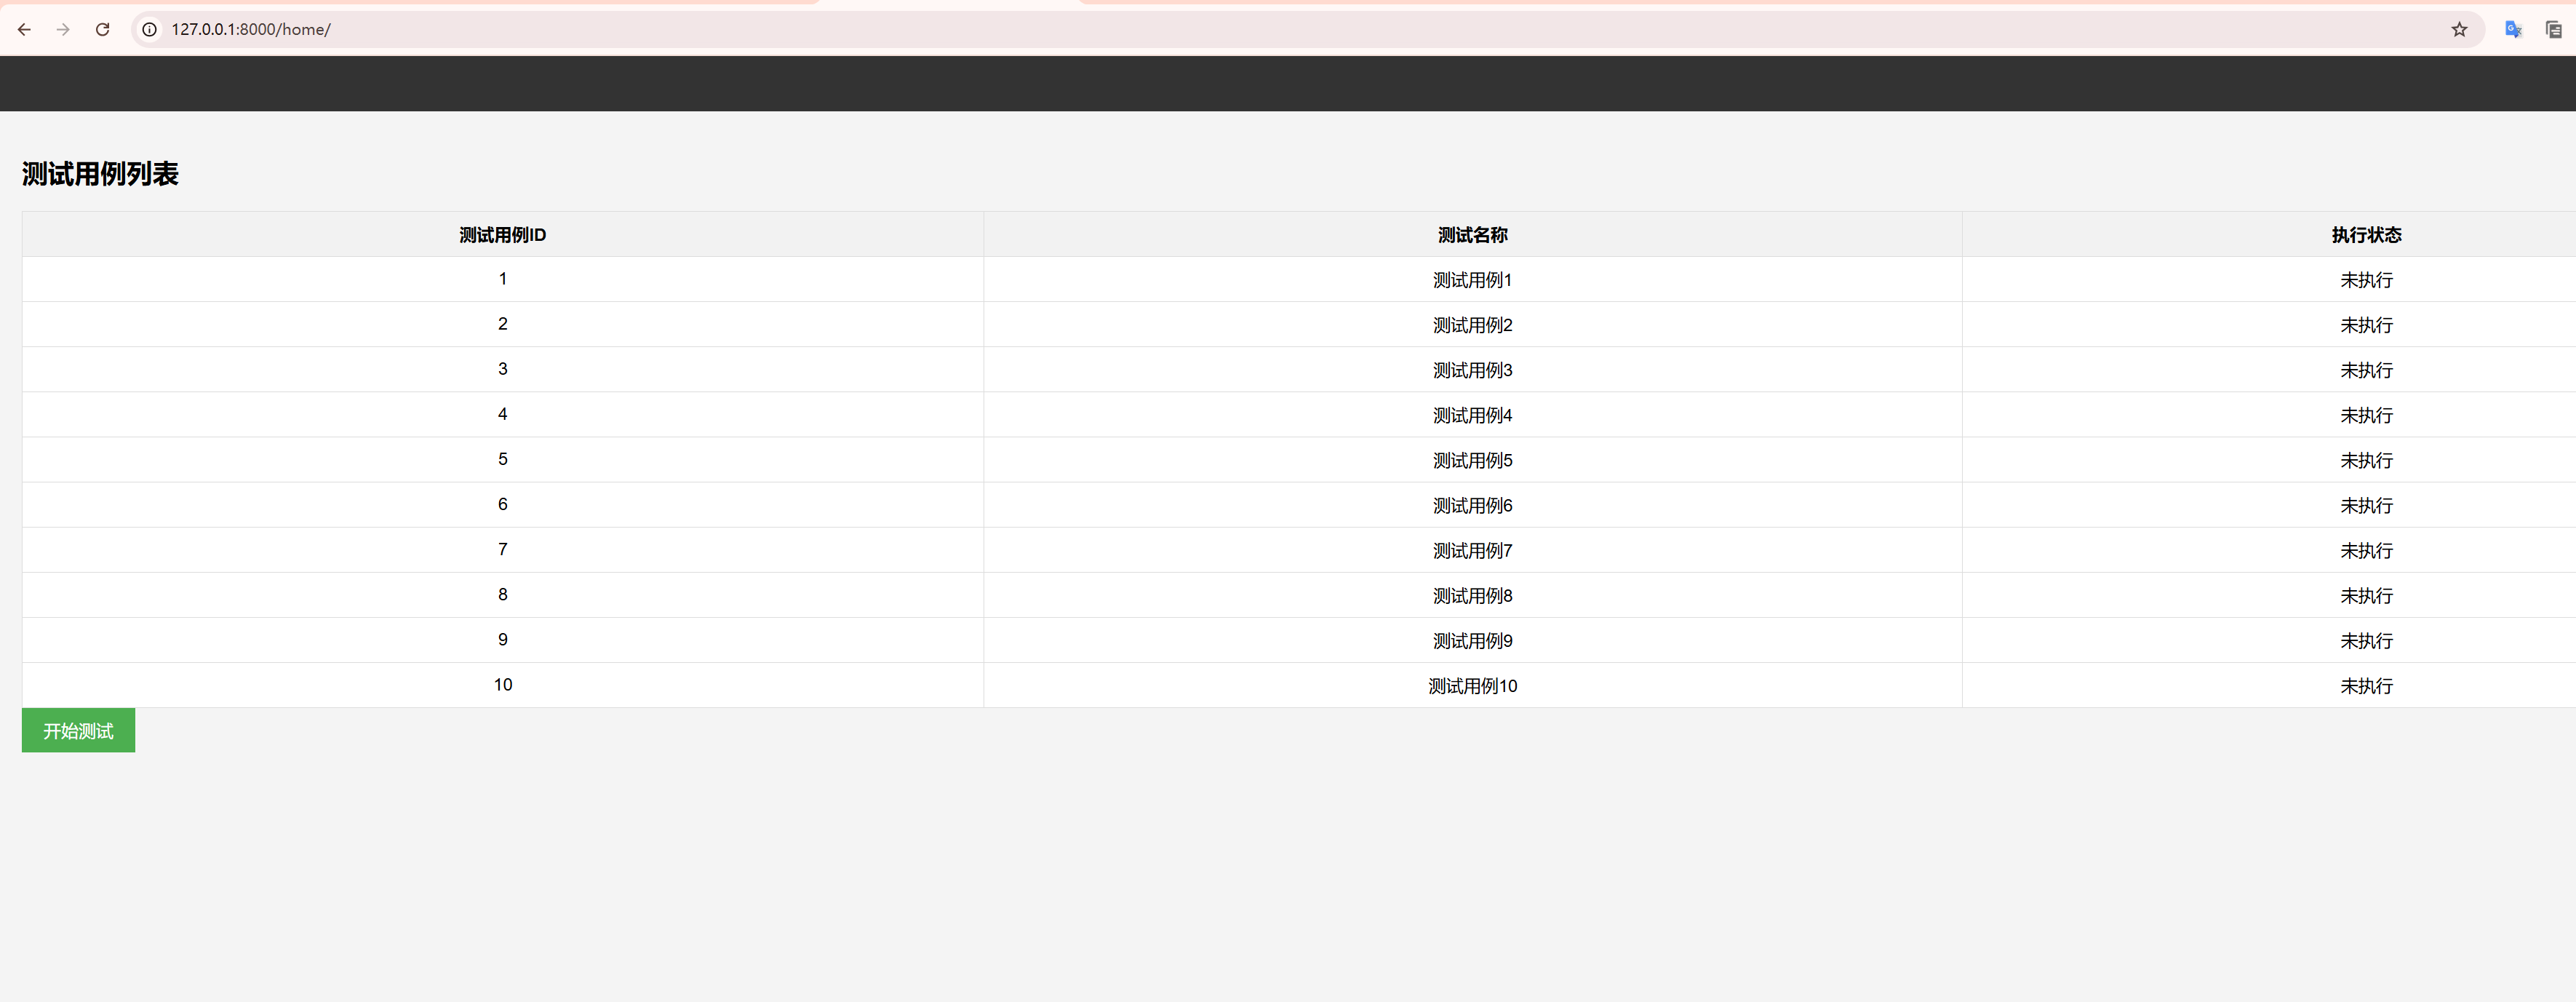
在实现主页前,我们可以先学习一下Django模版 > 2.4 模板继承,通过基础方便模版复用和修改。
视图:
from django.shortcuts import render

def home_view(request):
    test_cases = [
        {"id": 1, "name": "测试用例1", "status": "未执行"},
        {"id": 2, "name": "测试用例2", "status": "未执行"},
        {"id": 3, "name": "测试用例3", "status": "未执行"},
        {"id": 4, "name": "测试用例4", "status": "未执行"},
        {"id": 5, "name": "测试用例5", "status": "未执行"},
        {"id": 6, "name": "测试用例6", "status": "未执行"},
        {"id": 7, "name": "测试用例7", "status": "未执行"},
        {"id": 8, "name": "测试用例8", "status": "未执行"},
        {"id": 9, "name": "测试用例9", "status": "未执行"},
        {"id": 10, "name": "测试用例10", "status": "未执行"},
    ] #测试数据

    return render(request, 'home.html',{'test_cases': test_cases})
主页模版:
header.html 主要显示登录信息
<header>
    <div class="login-info">
        {% if user.is_authenticated %}
            <span>欢迎, <strong>{{ user.username }}</strong></span>
        {% else %}
            <a href="{% url 'login' %}" class="btn">登录</a>
        {% endif %}
    </div>
</header>
base.html 主体页面 block留空的标题 和 body
<!DOCTYPE html>
<html lang="zh">
<head>
    <meta charset="UTF-8">
    <meta name="viewport" content="width=device-width, initial-scale=1.0">
    <title>{% block title %}ULP Test Tool{% endblock %}</title>
    <link rel="stylesheet" href="https://cdnjs.cloudflare.com/ajax/libs/font-awesome/5.15.4/css/all.min.css">
    <style>
        body {
            font-family: Arial, sans-serif;
            margin: 0;
            padding: 0;
            background-color: #f4f4f4;
        }
        header {
            background-color: #333;
            color: white;
            padding: 15px;
            text-align: right;
        }
        header .login-info {
            display: inline-block;
            margin-right: 20px;
        }
        header .login-info span {
            margin-left: 5px;
        }
        main {
            padding: 20px;
        }
        table {
            width: 100%;
            border-collapse: collapse;
            margin-top: 20px;
            background-color: white;
        }
        table th, table td {
            padding: 10px;
            border: 1px solid #ddd;
            text-align: center;
        }
        table th {
            background-color: #f2f2f2;
        }
        .btn {
            padding: 10px 20px;
            font-size: 16px;
            background-color: #4CAF50;
            color: white;
            border: none;
            cursor: pointer;
        }
        .btn:hover {
            background-color: #45a049;
        }
        .loading {
            text-align: center;
            font-size: 20px;
            margin-top: 20px;
        }
    </style>
</head>
<body>
    {% include 'header.html' %}

    <main>
        {% block content %}
        {% endblock %}
    </main>


</body>

</html>
testtable.html
<h2>测试用例列表</h2>
<table id="testCaseTable">
    <thead>
        <tr>
            <th>测试用例ID</th>
            <th>测试名称</th>
            <th>执行状态</th>
        </tr>
    </thead>
    <tbody>
        {% for test_case in test_cases %}
            <tr>
                <td>{{ test_case.id }}</td>
                <td>{{ test_case.name }}</td>
                <td>{{ test_case.status }}</td>
            </tr>
        {% endfor %}
    </tbody>
</table>
<div class="loading" id="loading" style="display:none;">加载中...</div>
<button id="startTestBtn" class="btn">开始测试</button>
home.html
{% extends 'base.html' %}
{% block title %}主页 - 测试用例管理{% endblock %}
{% block content %}
    {% include 'testtable.html' %}
{% endblock %}
路由urls.py配置后,登录即可显示
